All posts by Matthew Gillespie (admin)

Adding a discriminator to a BC80XLT Scanner

Adding a discriminator to the Uniden Bearcat BC80xlt scanner isn’t an incredibly difficult task. BC80xlt discriminator

Simply find pin 9 of the MC3361 chip, connect a 2.2nf capacitor connected to a 10k ohm resister w/ a small piece of wire to go to a 3.5mm headphone jack. The capacitor connects to the radio shield, and that’s about it (I suggest you follow the steps above).
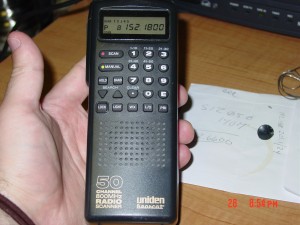
My BC80XLT
My BC80XLT

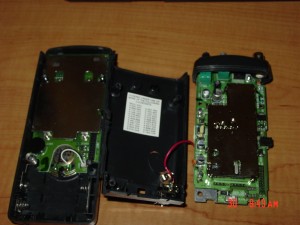
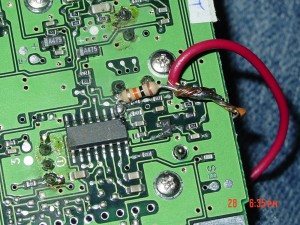
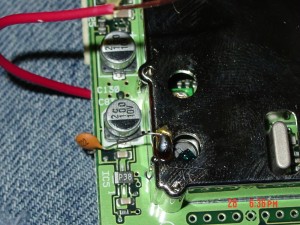
My BC80xlt  is slightly different that in the pictures in the link above. In some way, it’s closer to the BC60-xlt-2. The innards of my device include a main board, connected to a daughterboard.  The “down” side of the daughterboard has the chip, the “top” side has the shield.  This requires one to route the discriminator around the daughterboard, avoiding contact with anything accidentally. My soldering job is pathetic (I have no illusions about that). In my defense I am using a rusty tip which doesn’t conduct very well, but beyond that I really have no excuse aside from not being that skillful. My big concern was damage to the MC3361 by heat from the soldering iron. In fact, later I realized I was using a 30wWatt iron – not the specified 15Watt. (D’oh!) Turning it back on yields no apparent difference, so hopefully all is well.
Yes, I know..
Connection to pin 9
Yes, I know
Connection to the shield

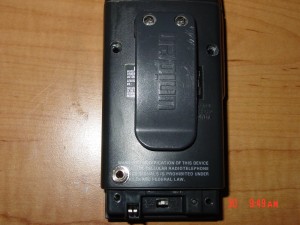
Here’s how the two separate parts of my scanner look:
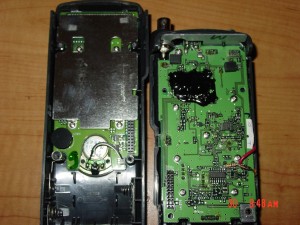
The top and bottom, which connect together
The connection to the 3.5mm jack
The 3.5mm discriminator tap

I had to make a few additional modifications. First of all, I removed the former cap and resistor (seen above),  and replaced it with a much better soldered joint (practiced for a bit prior to doing so). The 3.5mm jack has one problem – when pushed in all the way the male connector actually makes contact with the grounded sheild (that’s bad). The shield doesn’t appear to get hot, so I’ve used a small piece of plastic to prevent that from happening. Now everything fits snug, and this works great.

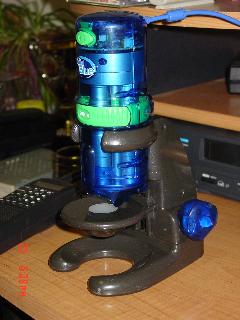
The Intel QX3 Microscope

Well, the bad news is the ant colony I was rearing has died off. I’m unsure what the problem was, but the ant queen was found dead, followed by the only two offspring dying a couple of days later.

I don’t have a decent digital camera that can take decent pictures of something as small as an ant, and I came across an old article detailing an interesting childrens toy: The Intel QX3 microscope.

The QX3 Microscope
The QX3 Microscope

It was released about 10 years ago, so I’m obviously behind the times. The resolution isn’t the greatest (the QX3 is a first-gen, but the QX5 has some improvements including better resolution).

The device runs well on linux, you need the following configuration options (in addition to normal USB drivers):

CONFIG_VIDEO_CPIA=m

CONFIG_VIDEO_CPIA_USB=m

The camera (the microscope is basically a webcam) has a number of interesting settings, all touchable via the /proc filesystem:

——– current min max default comment
brightness: 50 0 100 50
contrast: 48 0 96 48 steps of 8
saturation: 50 0 100 50
sensor_fps: 3.750 3 30 15
stream_start_line: 240 0 288 240
sub_sample: 422 420 422 422
yuv_order: YUYV YUYV UYVY YUYV
ecp_timing: normal slow normal normal
color_balance_mode: auto manual auto auto
red_gain: 15 0 212 32
green_gain: 31 0 212 6
blue_gain: 39 0 212 92
max_gain: 8 1 8 2 1,2,4 or 8
exposure_mode: auto manual auto auto
centre_weight: on off on on
gain: 4 1 max_gain 1 1,2,4,8 possible
fine_exp: 2 0 510 0
coarse_exp: 302 0 302 185
red_comp: 220 220 255 220
green1_comp: 214 214 255 214
green2_comp: 214 214 255 214
blue_comp: 230 230 255 230
apcor_gain1: 0×18 0×0 0xff 0×1c
apcor_gain2: 0×16 0×0 0xff 0×1a
apcor_gain4: 0×24 0×0 0xff 0×2d
apcor_gain8: 0×34 0×0 0xff 0×2a
vl_offset_gain1: 20 0 255 24
vl_offset_gain2: 24 0 255 28
vl_offset_gain4: 26 0 255 30
vl_offset_gain8: 26 0 255 30
flicker_control: off off on off
mains_frequency: 50 50 60 50 only 50/60
allowable_overexposure: 141auto auto 255 auto
compression_mode: auto none,auto,manual auto
decimation_enable: off off on off
compression_target: quality framerate quality quality
target_framerate: 15 1 30 15
target_quality: 5 1 64 5
y_threshold: 12 0 31 6
uv_threshold: 11 0 31 6
hysteresis: 3 0 255 3
threshold_max: 11 0 255 11
small_step: 1 0 255 1
large_step: 3 0 255 3
decimation_hysteresis: 2 0 255 2
fr_diff_step_thresh: 5 0 255 5
q_diff_step_thresh: 3 0 255 3
decimation_thresh_mod: 2 0 255 2
toplight: off off on off
bottomlight: off off on

You can alter any of these settings by doing something like:

echo “bottomlight: on” > /proc/cpia/videoX

(I’ve found that you need to have the camera actively in use for these settings changes to actually work).

Two programs work well with the camera – xawtv and tvtime. TvTime has a few minor issues that I’ve yet to work out, but I’ll figure that out eventually (namely the buffer isn’t filling up properly). XawTV has an issue with screencaptures – again an issue I’ll work out shortly.

For better images, I’ve found that setting sensor_fps to 10 works well. One I have a specimen on the slide and in proper position, I drop that to 3 to actually take the image.

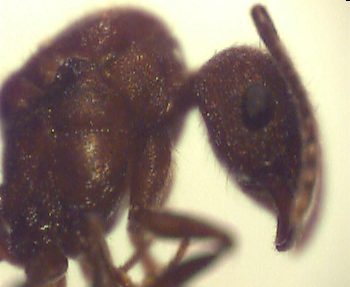
As I mentioned earlier, the resolution isn’t that great.  I’ve been told lighting is the key, and I’m still experimenting. Here’s the head of the queen ant, I’m sure of species:

Queen ant, taken w/ QX3

Pinnacle PCTV Pro

My old BrookTree Tuner card died recently. I only used it for basic chores – backup of VHS tapes, maybe watching the Deadliest Catch while I worked…

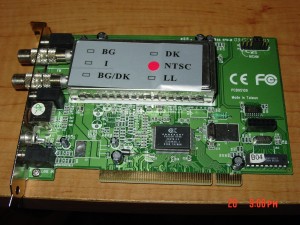
My old generic card (if you want it, pay for shipping and it's yours)

Everyone online is building DTRs using the latest technology, but that’s not how I generally work. Cheap and worthy is about the only qualification I have – and you can pick up a nice Pinnacle PC-TV Pro online for $25.00. (ebay)

The bigger problem is determining the tuner… a difficult task to do when looking at a picture of an item on ebay. When doing research on a BTTV card – I’ve got to recommend http://www.bttv-gallery.de/

Someone thankfully put a lot of research into this site. If you search around, there’s a lot of griping on the internet about “the tuner doesn’t work on so-and-so card”. Using this site, I was able to easily discern different revisions of AcerTV and Pinnacle cards – which is important when you plan on using the card under Linux.

So, here’s my card:

01:07.1 Multimedia controller: Brooktree Corporation Bt878 Audio Capture (rev 11)
Subsystem: Pinnacle Systems Inc. PCTV pro (TV + FM stereo receiver, audio section)
Flags: bus master, medium devsel, latency 64, IRQ 17
Memory at fc0fe000 (32-bit, prefetchable) [size=4K]
Capabilities: [44] Vital Product Data <?>
Capabilities: [4c] Power Management version 2
Kernel driver in use: Bt87x

I’ve found that for sound support, you want to make sure to load the “tuner” module PRIOR to inserting the “bttv” module  (otherwise you’ll end up with no sound). The module options that worked for me were: “bttv card=39” and “tuner=33”. If you’re looking for a full list of card and tuner numbers, look at the Linux source Documentation/video4linux/CARDLIST*

For viewing, I’m using xawtv and tvtime. I’m still fighting w/ sound issues – one _should_ be able to either set /dev/dsp1 (the bt card on my system) as the audio source – but I’ve yet to get that to work correctly.

One can also use SOX to pipe /dev/dsp1 to /dev/dsp0, but I’m still battling w/ that. I believe the following should work, but have yet to get it to execute w/o throwing errors:

sox -q -c 2 -s -r 32000 -t alsa hw:1 -t alsa -r 32000 hw:0

My current workaround is a simple 3.5mm male/male connector to connect the output of the PCTV Pro to the Aux Input of the onboard soundcard.

Recording from the card is fairly easy, too.  XawTV has an application called “streamer”, but I’m much more inclined to use menconder (part of the mplayer package):

mencoder -oac mp3lame -ovc lavc -lameopts mode=1:vbr=2:q=4 -lavcopts vcodec=mpeg4 -tv driver=v4l:norm=ntsc:channel=3:chanlist=us-cable:adevice=/dev/dsp:width=640:height=480 -af volume=-25 -o /tmp/tv.avi tv://


Mounting a raw dump (using dd and losetup)

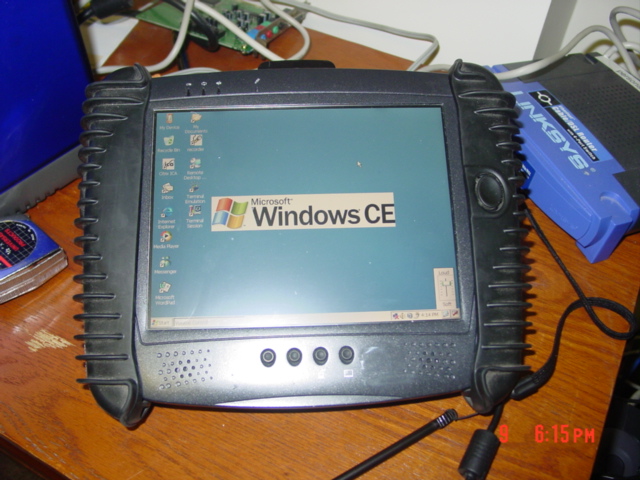
I’ve just picked up a DT Research WebDT366 Tablet. I’m in need of a good touchscreen for a CarPC project, and the Lilliputs are a little more expensive than I had hoped to go (Appx, $250.00 on Ebay).

First boot (I'm finishing up the Gentoo Linux Image)

The WebDT366 was only $90 (in fairly good condition), and I figured if I didn’t end up using it for a CarPC (or as simply the touchscreen for the CarPC), I could certainly find something else to do w/ it.

tschak909 has already done a good amount of work getting Linux to run on the device. (http://forum.linuxmce.org/index.php?topic=6663.0). Thankfully it’s x86, so life should be a little easier when building custom images.

Wanting to know what packages and configuration Thom has used in his installation, I needed a way to mount the raw disk image (http://www.localeconcept.com/private/webpad-beta2.dd.bz2). Googling didn’t get me at the exact answer, but it got me close enough to figure it out.

First off, use losetup and and offset (flagged by -o).  When running “file” on the image, you’ll see something like this:

lennybruce ~ # file /tmp/webpad-beta2.dd
/tmp/webpad-beta2.dd: x86 boot sector; partition 1: ID=0x83, active, starthead 1, startsector 63, 1023057 sectors

As you can see, partition one starts at sector 63. (512 bytes * 63 = 32256). Having this information, mounting is easy:

lennybruce ~ # losetup -o 32256 /dev/loop0 /tmp/webpad-beta2.dd
lennybruce ~ # mount /dev/loop0 /mnt/loop
lennybruce ~ # ls /mnt/loop/
bin   cdrom  etc   initrd      lib         media  opt   root  selinux  sys   tmp  var
boot  dev    home  initrd.img  lost+found  mnt    proc  sbin  srv      temp  usr  vmlinuz
lennybruce ~ #

That’s it for mounting a raw disk image. Using the information Thom has provided in his image (video driver, input drivers, etc)… I’m building a custom Gentoo image that will hopefully be the basis or front-end of a CarPC.