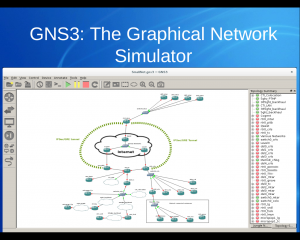
It had been a while since I’ve attended a Central Pennsylvania Linux Users Group meeting. So why not jump in feet first with a demonstration of the capabilities of the Graphical Network Simulator 3.
(Click the above image for slides)

It had been a while since I’ve attended a Central Pennsylvania Linux Users Group meeting. So why not jump in feet first with a demonstration of the capabilities of the Graphical Network Simulator 3.
(Click the above image for slides)

If you’ve not had the chance to contribute to the GNS3 crowdfunding event, I strongly encourage you to do so. The GNS3 team is working on version 1.o, and as you’ll see on their features list, they’ll be integrating a handful of exciting new features into the GUI — including switching support (ala Cisco IOU I’m hearing).
I woke up at 2am this past Wednesday to get in on the early-bird Premium package, and as of now there’s under 100 left. They met their fundraising goal within 24 hours but why not contribute to some really good FOSS.
In the last few days, I’ve been working to build up my home networking lab. I’m using a fairly typical setup nowadays — real Layer 3 switches connected to a host machine that runs GNS3 as well as VirtualBox. Having recently installed Vyatta and Mikrotik RouterOS VM guests, I decided that I would play with something I’ve never touched before — Juniper’s JunOS.
The documentation for how to install JunOS into a Qemu environment is constantly replicated across the web, so I have no intention of doing so here. (Have a look here to get yourself started). In my first few attempts to create a VM guest, I followed the instructions thoroughly, but eventually I opted to move the full creation into VirtualBox. That’s when I learned a lot about the nuances between installing on either platform.
One of the first problems I encountered when trying to install into a VirtualBox container was an odd out-of-space message when installing my modified version of JunOS 8.5R1.14 :
WARNING: The /tmp filesystem that is created by the next stage of
WARNING: the installer does not have sufficient space. This package
WARNING: requires 159804k free (2k for configuration
WARNING: files and 159802k for the new software), but there is
WARNING: only -12140k available.
What makes this message odd is that I have plenty of disk space. It’s also odd that I only encountered this in my VirtualBox/vdi installations, not on Qemu/qcow2 installations. Before I dug any further, I rebuilt the VM using 10G of storage instead of the recommended 4G, and adjusted each of the individual partitions accordingly. This proved to be ineffective as I was once again greeted with this message.
The warning message is generated by the function “tmp_storage()” in the +REQUEST file inside jinstall-8.5R1.14-domestic.tgz. One of the expr calls is failing, but I never bothered to dig into why and instead removed it with a quick patch. The bootstrap installation now appears to be good and will prompt you to reboot.
At this point, ensure that you have serial port 1 redirected to a host pipe. If you don’t, shut down the VM and add one — you will need it to see what’s going on.
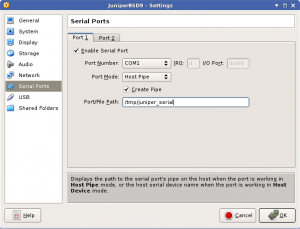
You can attach to the host pipe a few different ways, I prefer to have socat connect to it and create a /tmp/juniper0 PTY that I can hook into from minicom. Do keep in mind that socat doesn’t respawn automatically, so if you disconnect from the PTY link you may have to restart socat.
socat UNIX-CONNECT:/tmp/juniper_serial PTY,link=/tmp/juniper0,raw,echo=0,waitslave
Upon reboot, the system would now install up to a point and then hang. After a few moments it was obvious something didn’t give.
A few reboots later I realized that this was going nowhere. Since my test build in Qemu alone did install, I opted to simply convert the qcow2 file to something I could import into VirtualBox.
qemu-img convert -O raw ~/GNS3/QEMU/olive-base.img JuniperBase.raw
VBoxManage convertdd JuniperBase.raw JuniperBase.vdi
VBoxManage modifyvdi JuniperBase.vdi compact
However this caused an interesting bug: Prior to installing JunOS, packet captures on the guest indicated that OSPF all-router multicast messages were entering the guest VM. After installation, that was no longer the case. I tried numerous times to resolve this, but with no luck.
Finally I opted to build a 4.11 FreeBSD instance and install Junos 9.6R1.13. My first attempt failed with the following message:
ELF binary type “0” not known
If you see this message, make sure that you’ve properly replaced checkpic with /usr/bin/true. In my case, I had accidentally just copied true to the directory and didn’t replace checkpic. After fixing my mistake, the bootstrap installation succeeded and prompted me for a reboot.
After reboot the full install commences. I was quite surprised when it completed without any problems. I was skeptical that this was going to fix the multicast problem, but lo and behold, post reboot multicast actually functions.
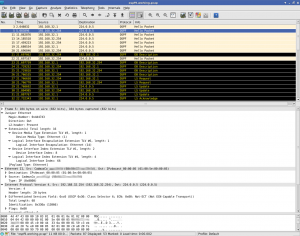
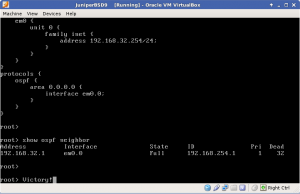
So in the end, my working VirtualBox JunOS instance consisted of FreeBSD 4.11, JunOS 9.6R1.13 and VirtualBox 4.2.12 r84980.
I was hoping to have time to further familiarize myself with IPv6 this weekend – but workplace emergencies, sleep, and a technical glitch slowed me down. Here’s the story of the technical glitch.

GNS3/dynamips can handle emulation of a number of routers, and I was happy to see that it can emulate host PCs as well. Unfortunately networking in GNS3 is done via UDP tunnels – something that requires a Qemu patch to implement.
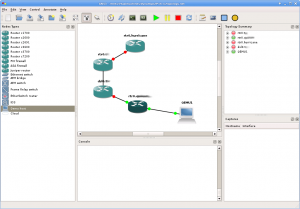
In Gentoo, simply building GNS3 from the Sunrise Overlay doesn’t provide sufficient support for this requirement. Emulated routers (and I’m assuming switches) work fine when networked together. Emulated host machines work fine when NOT connected to anything. But once you network things together you’ll discover that your Qemu host won’t start.
Here’s why – when you start a Qemu host, this is essentially what GNS3 runs:
/usr/bin/qemu -name QEMU1 -m 256 /mnt/virtualmachines/dynips/IPv6-tc/working/QEMU1/FLASH -hdb /mnt/virtualmachines/dynamips/IPv6-tc/working/QEMU1/SWAP -enable-kvm -net nic,vlan=0,macaddr=00:aa:00:8f:e4:00,model=rtl8139 -net udp,vlan=0,sport=20000,dport=10006,daddr=127.0.0.1 -net nic,vlan=1,macaddr=00:00:ab:fa:72:01,model=rtl8139 -serial telnet:127.0.0.1:3000,server,nowait -no-acpi -vnc :0
GNS3 attempts to use the -net udp option, something not offered in the default QEMU-KVM distribution. With no Gentoo USE flags to add the patch in either 0.13.0 or 0.14.50, I decided to simply upgrade to 0.14.50 and see if it was part of the default build:
# kvm –version
QEMU emulator version 0.14.50 (qemu-kvm-devel), Copyright (c) 2003-2008 Fabrice Bellard
# kvm –help | grep “net udp”
#
Nope, it’s not. So the next step is to remove app-emulation/qemu-kvm from your system and build it by hand.
First, remove kvm and download the source from kernel.org:
# emerge -C app-emulation/qemu-kvm
# cd /usr/src/
# wget http://mirrors.kernel.org/gentoo/distfiles/qemu-kvm-0.13.0.tar.gz
Unpack and patch it, using the patch provided by the gns-3 team .
# tar zxvpf qemu-kvm-0.13.0.tar.gz
# cd qemu-kvm-0.13.0/
Testing the patch, I ran into a handful of issues:
# patch –dry-run -p1 < /mnt/nas/downloads/qemu-0.13.0-
mcast-udp.patch
patching file Makefile.objs
Hunk #1 FAILED at 25.
1 out of 1 hunk FAILED — saving rejects to file Makefile.objs.rej
patching file block/raw-win32.c
Hunk #1 FAILED at 93.
Hunk #2 FAILED at 347.
2 out of 2 hunks FAILED — saving rejects to file block/raw-win32.c.rej
patching file hw/e1000.c
Hunk #1 FAILED at 567.
1 out of 1 hunk FAILED — saving rejects to file hw/e1000.c.rej
patching file net/udp.c
patching file net/udp.h
patching file net.c
Hunk #1 FAILED at 30.
Hunk #2 FAILED at 1075.
2 out of 2 hunks FAILED — saving rejects to file net.c.rej
patching file net.h
Hunk #1 FAILED at 33.
1 out of 1 hunk FAILED — saving rejects to file net.h.rej
patching file qemu-options.hx
Hunk #1 FAILED at 996.
1 out of 1 hunk FAILED — saving rejects to file qemu-options.hx.rej
A quick modification and we’ve got a new patch file. This one applies nicely:
# patch –dry-run -p1 < /mnt/nas/downloads/gentoo-qemu-0.13.0.gns3.patch
patching file Makefile.objs
patching file QMP/qmp-commands.txt
patching file block/raw-win32.c
patching file config-all-devices.mak
patching file config-host.h
patching file config-host.h-timestamp
patching file config-host.ld
patching file config-host.mak
patching file hw/e1000.c
patching file libdis/config.mak
patching file libdis-user/config.mak
patching file libhw32/config.mak
patching file libhw64/config.mak
patching file net/udp.c
patching file net/udp.h
patching file net.c
patching file net.h
patching file qemu-doc.html
patching file qemu-img-cmds.texi
patching file qemu-img.1
patching file qemu-monitor.texi
patching file qemu-nbd.8
patching file qemu-options.hx
patching file qemu-options.texi
patching file qemu-tech.html
patching file qemu.1
patching file roms/seabios/config.mak
patching file roms/vgabios/config.mak
patching file x86_64-softmmu/config-devices.mak
patching file x86_64-softmmu/config-devices.mak.old
patching file x86_64-softmmu/config-target.mak
vonnegut qemu-kvm-0.13.0 #
So let’s apply it for real and then configure, build, and install our new Qemu:
# patch -p1 < /mnt/nas/downloads/gentoo-qemu-0.13.0.gns3.patch
…
# ./configure –prefix=/usr –target-list=i386-softmmu –enable-sdl
# make && make install
A quick check to ensure UDP tunneling is compiled in:
# /usr/bin/qemu –version
QEMU emulator version 0.13.0 (qemu-kvm-0.13.0), Copyright (c) 2003-2008 Fabrice Bellard
# /usr/bin/qemu –help | grep “net udp”
-net udp[,vlan=n]sport=sport,dport=dport,daddr=host
#
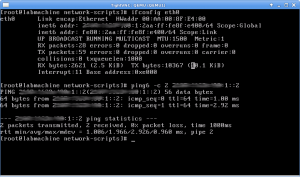
And voila – now not only does my host machine start when networked into my layout, it also has connectivity:
Next up – continue lab work with IPv6, and begin studying for my CCNP.