Category Archives: RF

PIC simulation using GPSIM

As if I don’t have enough going on already (school, lab, work, numerous hobby projects, cigars and Tom Waits), I’ve begun modifications of one of those small radio-controlled helicopters using a PIC16f628A microcontroller.

I’ve done something similar with an radio-controlled car in the past (very basic “go forward, turn, go forward, back up” stuff though), but that was 5+ years ago.  My goal this time is to code a program allowing the helicopter to lift-off, turn in search of the brightest source of light, and follow it. (Have you ever seen Sea-Monkeys go crazy over a flashlight? That’s my goal here, but with a helicopter)

A lot has changed in 5 years.  The last time I worked on a project like this (as basic as it really is), I was using a PIC IDE on Windows 2000 (something I’ve since misplaced). I was also using the PIC16f84A then, a chip that’s since become less than favorable (less memory, needs an external oscillator)

Having migrated entirely to the Linux operating system (aside from a dual-boot laptop for school), I went in search of a decent C compiler and simulator – and I really lucked out.  SDCC and GPSIM were exactly what I needed. (I have to give Micah Carrick a big thanks for his article that steered me in this direction)
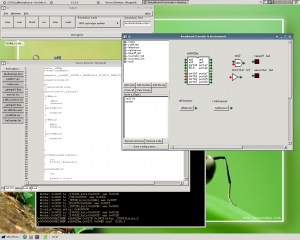
My Desktop running GPSim and some test code

SDCC is simply a Small Device targetted C compiler, so I’m not going to go into in depth  here (see Micah’s great article above).  BUT I did have a major issue getting it set up initially:

The problem I experienced with SDCC was that the Gentoo Portage distributed version is 2.5.6 (as of March 2010).  Unfortunately, memory locations for individual pins on PORTA and PORTB on the PIC16f628A aren’t defined in the header files in 2.5.6. Usually, one can access them via RB[0-7], etc… So my advice is this – use the subversion distributed version of SDCC (which is presently 2.9.7)

My second issue getting set up  was with GPSIM. I’ve not had a chance to delve into the reasons, but for some unknown reason the version 0.23.0 and 0.24.0 wouldn’t play nice with any controller I tried:

gpsim -p16f627 -c testcode.stc

gpsim – the GNUPIC simulator
version: Release 0.23.0

type help for help
**gpsim> SimulationMode:51
FIXME gui_breadboard.cc Build
WARNING: command line processor named “16f627” is being ignored
since the .cod file specifies the processor
WARNING: Ignoring the hex file “testcode.asm”
since the .cod file specifies the hex code
RRR gui_breadboard.cc:createLabel p16f627 11 42
Disabling WDT
FIXME: HLL files are not supported at the moment
**gpsim> running…
attempt write to invalid file register
address 0x10a, value 0x1
could not decode trace type: 0x0
0x0000000000000066 p16f627 0x00FC 0x008A movwf pclath
Read: 0x0001 from W
Invalid Trace entry: 0x0

After flailing around trying to make gpsim happy, I finally downgraded to 0.22.0, finding that I had no issues with it.

GPSIM has some nice features – stopwatch, available breakpoints,  simulated oscilloscope probes, the ability to lay out basic logic circuits, simulated LEDs and pushbuttons, etc
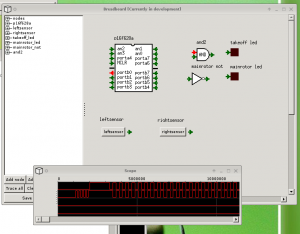
Simulated Scope Probes

Ok, so now I’m all set to develop. I’ll post videos of the helicopter before and after modifications, as well as a before and after test-flight shortly.

Update: 3/28/2010:

Rob Pearce has infomed me that the issue above (regarding 0.2[34].0) has been now been fixed in subversion.  While writing this article on the road, perusing the bugtracker (or reporting the bug) somehow slipped my mind – my bad. Kudos for the quick response time (once someone actually bothered to report it).

In any event, this article is meant to point out an excellent tool. Have a look at it.

The Tiny Tracker 3+ APRS encoder

I’ve been planning on building an APRS beacon into my car for some time, initially contemplating using a WebPadDT + XASTIR to do the work, but that idea quickly posed an issue – the WebPad was too big to reasonably it in the car with another passenger (at least in my car).

Yes, I’m well aware that APRS is not really meant as a vehicle tracking device, and in many circles it’s frowned upon.

I’ve enjoyed working with PIC microcontrollers since I was first introduced to the 16f84A years ago. But in all honestly, I’ve not done more than “blinky lights” and very basic modifications to an RC car with them. (Take a look at a great article to get started working with PICs)

Byonics has a cool kit – the Tiny Track3+. Figuring I’d use it as a chance to exercise my soldering skills (which need a bit of work), and liking the fact that I wouldn’t have to hunt for each individual component on my own, I picked one up (with GPS unit).

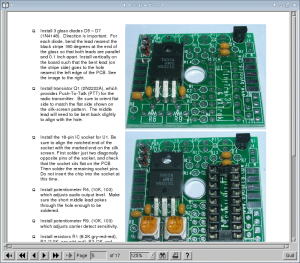
The project build steps are extremely well documented. Literally, every step along the way is fully explained along with color images in the downloadable PDF. Build time takes under 1 hour (actually closer to 30 minutes, although I incorrectly soldered the female DB9 connector to J2 and had to waste time de-soldering it).

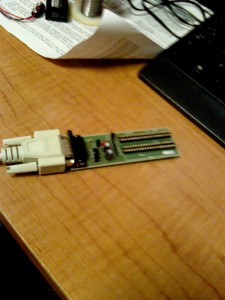
Prior to installing the accompanying PIC16f628A chip, I made sure to back up the currently running software (these chips are dirt cheap, and I’m not entirely sure Byonics will just give me the software if I ever have to replace the chip) Looks like my old serial programmer still works (remember – the USB to serial adapters generally don’t put out enough voltage to program a chip, so make sure you have on-board serial):

Old serial PIC programmer

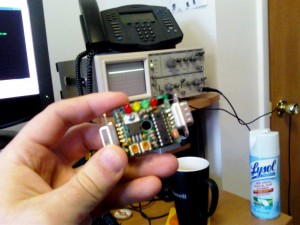
After backing up the code, I pop the chip into place on the TinyTracker, and voila -the finished product looks like this:

TinyTracker3+ Fully Assembled
TinyTracker3+ Fully Assembled (I'm using Lysol in my coffee since I'm out of Half and Half)

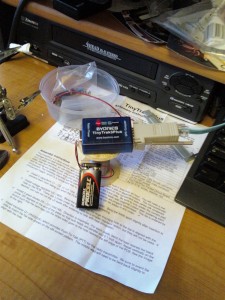
The Byonics crew have also written software to configure the TinyTracker. Luckily it runs under WINE so I didn’t have to reboot. To configure, power the J1 DB9 connector with a 9volt battery.

TinyTracker3+ in it's case, being configured serially

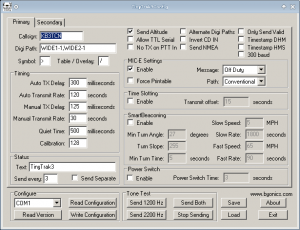
And run the configuration program (again, it’s fairly well documented in the manual):

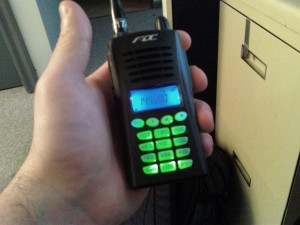
After being hung-up in customs (and a brutal snowstorm), I finally got the radio component of my APRS system – the FD-150A (It took almost a month to get here from Hong Kong)

The output voltage  on the FD-150 battery is ~6.25V, too low to power the TinyTracker3 (which requires 7+V). A voltage multiplier would probably fix that, but my overall goal is to encase all components in a NEMA style box, powering it off the car.  So for the rest of the testing period, I’m using an external power-supply.

Hopefully in the next few weeks, I’ll have time to finish the entire setup. Keep checking back, I’ll post updates when I can.

Finally Saying No to NoCatSplash

For the last 6 months or so, I’ve been running a free wireless access point for my neighborhood. In an effort to get my local community to know each other (and local goings-on), I’ve back-ended the system using the elgg social networking platform.

To use the free wifi, you have to register on the social site.

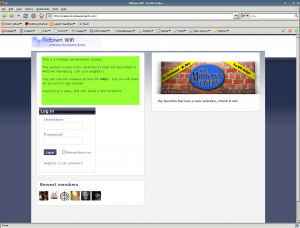
The Captive Portal

Uptime however has been a major pain – for quite some time NoCatSplash has been broken in DD-WRT. Ever since version 24 (at the very least), it’s been grouchy – all of the sudden not working and requiring a reboot (or possibly clearing and resetting the iptables targets and restarting splashd)  to fix. The wiki documents a few workarounds, but I’ve gotten tired of the overall bugs.

Initially I planned on simply fixing it, but after a little bit of thought,  I decided to give OpenWRT another look. I’m sure I could have gotten away with using the mini or micro versions of DD-WRT and adding to it, but last time I used OpenWRT’s build environment I was really impressed – so I spent this weekend working with it again.

Building your own image is simple – using the ImageBuilder system (I’m working with WRT-54G’s)  simply “make image” setting the target PROFILE and PACKAGES via environment variables. This method uses existing binary packages to build a .bin or .trx file for easy installation (via the web interface or mtd command). “make info” will give you a long list of profiles, and packages that are readily available are contained in the packages subdirectory.

Recompiling packages is extremely easy – download the SDK:

mkdir ~/devel && cd ~/devel

wget http://downloads.openwrt.org/kamikaze/8.09.2/brcm-2.4/OpenWrt-SDK-brcm-2.4-for-Linux-i686.tar.bz2

tar xjvpf OpenWrt-SDK-brcm-2.4-for-Linux-i686.tar.bz2

If the package already exists, check it out via subversion:

cd OpenWrt-SDK-brcm-2.4-for-Linux-i686

svn export svn://svn.openwrt.org/openwrt/packages/net/<packagename>  package/<packagename>

And to compile simply execute:

make package/<packagename>/compile V=99

(On older versions it’s “make package/<packagename>compile V=99″)

After hitting my head against the nocatsplash package’s failure to build correctly, I finally opted to look at nodogsplash. “Because it will at least build” is probably not the best way to choose captive portal software, but it’s mine.

First thing requiring a fix is a bug that causes nodogsplash to crash when one sends a request to the auth-server without a “redir” GET variable being set – a bug evidenced by:

links “http://192.168.1.1:2050/nodogsplash_auth/?tok=fffffff”

Thankfully the crash is “gracefully” handled in safe.c’s safe_strdup()…. but it still causes the daemon to crash.

So – a quick patch, as well as some added “features” (including a magic token) and I’m set. Patches to source can be added to package/<packagename>/patches. Upon make, patches in this directory are first applied.

So instead of waiting around for a fix to NoCatSplash in DD-WRT, I’m moving on. So far NoDogSplash has proven effective – although I’m far from actually migrating to it (the old access point is still running for the time being). In the next few weeks I should have a custom web interface built, as well as pmacctd configured (I am exporting Netflow version 9 data to a collector as a C.Y.A measure), and bandwidth shaping properly enabled.

Custom patches to NoDogSplash are forthcoming.

Adding a discriminator to a BC80XLT Scanner

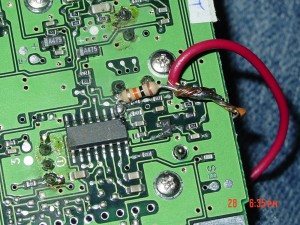
Adding a discriminator to the Uniden Bearcat BC80xlt scanner isn’t an incredibly difficult task. BC80xlt discriminator

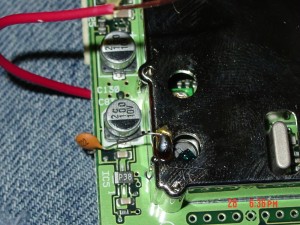
Simply find pin 9 of the MC3361 chip, connect a 2.2nf capacitor connected to a 10k ohm resister w/ a small piece of wire to go to a 3.5mm headphone jack. The capacitor connects to the radio shield, and that’s about it (I suggest you follow the steps above).

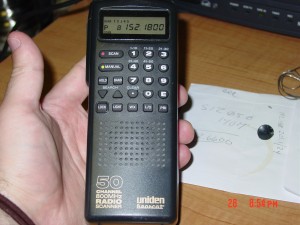
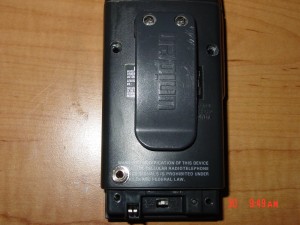
My BC80XLT
My BC80XLT

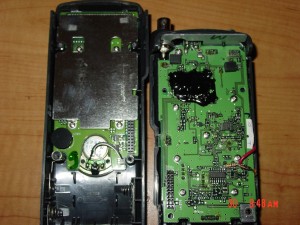
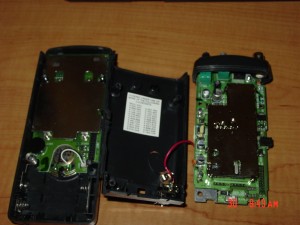
My BC80xlt  is slightly different that in the pictures in the link above. In some way, it’s closer to the BC60-xlt-2. The innards of my device include a main board, connected to a daughterboard.  The “down” side of the daughterboard has the chip, the “top” side has the shield.  This requires one to route the discriminator around the daughterboard, avoiding contact with anything accidentally. My soldering job is pathetic (I have no illusions about that). In my defense I am using a rusty tip which doesn’t conduct very well, but beyond that I really have no excuse aside from not being that skillful. My big concern was damage to the MC3361 by heat from the soldering iron. In fact, later I realized I was using a 30wWatt iron – not the specified 15Watt. (D’oh!) Turning it back on yields no apparent difference, so hopefully all is well.

Yes, I know..
Connection to pin 9
Yes, I know
Connection to the shield

Here’s how the two separate parts of my scanner look:

The top and bottom, which connect together
The connection to the 3.5mm jack
The 3.5mm discriminator tap

I had to make a few additional modifications. First of all, I removed the former cap and resistor (seen above),  and replaced it with a much better soldered joint (practiced for a bit prior to doing so). The 3.5mm jack has one problem – when pushed in all the way the male connector actually makes contact with the grounded sheild (that’s bad). The shield doesn’t appear to get hot, so I’ve used a small piece of plastic to prevent that from happening. Now everything fits snug, and this works great.