NetflowLive!

The good news is this – we’re now up to 30 subscribers on the neighborhood wifi.

Currently 30 subscribers on the wireless

With an average of 1.75 users online at any given moment:

Users online at any given moment.

I’ve also started working on writing a Netflow analyzer application, based off a similar application I wrote for work.  At the current time, this version  only streams real-time connection endpoints and DNS statistics (last resolved sites, most resolved sites), as well as detects TCP SYN scans. Each flow record is also colorized (similar to what you would see in Wireshark), to further categorize the type of connection.

Instead of calling the gethostbyaddr() function on a destination IP  (which simply pulls a PTR record, and in the world of vhosts is a poor representation of where a user is actually connecting),  subscriber DNS queries are syslogged offsite and parsed.  The Netflow Live application I’m building uses those parsed and stored queries to give a fairly accurate determination of what site is being visited when.

Visited URLs could also be determined and logged  if a transparent Squid proxy was utilized on the Access Points. I have NO intention of doing this, however. I’m only concerned with endpoints and protocols being used. The number one protocol in use on the network:  HTTP (Shocking!)
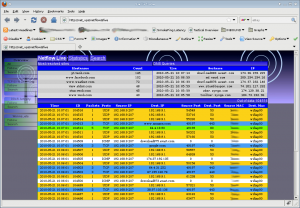
Netflow Live (streaming recent connections)

For those of you unfamiliar with Netflow, it’s a solution put forth by Cisco for IP traffic profiling. The two main elements are an exporter (usually a router) and a collector (which the exporter sends flow data to). Netflow does not include data  payloads , ONLY a log of the endpoints used in each connection. (Think of it this way: When you make a long distance phone-call, you receive a monthly bill that details your phone number called another phone number at a specific time, for a specific duration. The phone company doesn’t actually have record of the conversation, however).

The data collected does include IP source and destination addresses, Transport layer source and destination ports, byte countes, packet counts, TCP flags, and MAC addresses. (Below is all the fields actually captured)

This is all the data that's actually stored from each connection.

So what does this allow? Utilizing Netflow, I can determine subscribers on the network with certain network signatures for viruses, detect some DoS attacks and SYN scans, and graph the most commonly used protocols on the network.

I can also shape traffic based on determinations made by looking at the data. Is someone experiencing bad Skype calls due to someone streaming video over HTTP? I can use the netflow data to reshape things as needed.

So what’s in the works? Using NetGeo data, I plan on mapping connection endpoints on a US world map, allowing a visual display of where in the world most connections are destined.

Orion Netflow offers the same functionality I'm going for - but at a hefty pricetag.

But next up:  I  need to fix the  bug preventing a software reboot of the access points – hopefully I can get to that this weekend.

Update  6/9/2010:

Jake Wilson pointed out the free NetFlow analyzer Scrutinizer by Plixer. I’ve not had a chance to look it over yet – but check out this video about the product.  I first came across that video a month or two ago… it was like staring at the sun, initially I couldn’t tell if I liked it or not – but I watched it like 20 times that day.  GREAT work guys, catchy AND entertaining.

Bow to the new Queen

After attending the season ending of the Harrisburg Symphony Orchestra, grabbing a bite at Harrisburg’s best sushi joint (props to my other favorite though, which is much less expensive), and heading home, my girlfriend pointed out “there’s a HUGE ant in the corner by the front door.”

It was this time last year that my almost successful attempt at rearing an ant colony in a plaster-cast formicarium failed.  Since then, other projects have taken precedence, and all my equipment (test-tubes, tubing, home-made asperators, numerous containers, etc…) have been packed away in the basement). I immediately ran downstairs and grabbed out the first container and spool of tubing I could find.

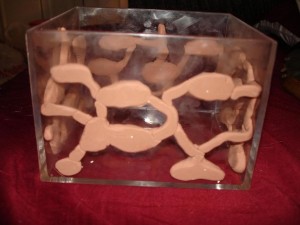
One of the earlier plaster cast nests

I’m still not entirely sure what killed off the last colony –  only 2 ants hatched prior to them all being found dead.  There’s a couple likely possibilities: I fed them a few pieces of birdseed – learning later that some birdseed contains pesticide; there may have been a lack of oxygen in the formicarium (I was hoping the large amount of evaporating water would provide an ample amount of oxygen), the clay used to form the chambers in the formicarium possibly contained sulphur….

So, I’m picking up and starting all over. The gang at antfarm.yuku.com have put together a great forum on ant care, building formicariums, general tips – AND they do ant identifications.

The New Ant Queen
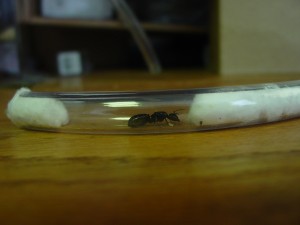
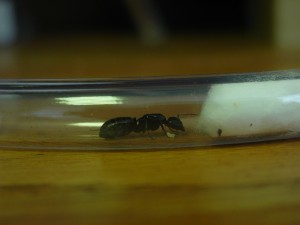
She appears to have laid a couple eggs.

After providing the pictures and a brief description – it appears this may be Camponotus Pennsylvanicus. (I believe that’s a carpenter ant). Not exactly the best thing to have in one’s house, but I’ve seen no visible wood damage anywhere.

Instead of re-using the former plaster-cast nest, I’m starting over. The plastic box is readily available at the local Michaels Arts and Crafts Store, I purchased 3 initially, so I have another one laying around. To form the chambers in your formicarium, you simply apply clay to the walls. After filling the enclosure with plaster of paris and allowing time for it to dry, you pull the cast out of the box and remove the clay.

Image is of yuku.com member "The Darkwun" applying clay.

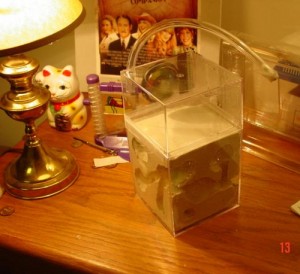
My former nest (see the topmost  picture) had a drilled hole to allow for application of water at the base. The top portion (the lid) of the nest had a thermometer and humidity meter. I also had a connector tube allowing me to connect the formicarium to a food scavenging area. The nest itself had many wraparound tunnels going around each side.

My current plans are to keep the exact same idea, although use deeper chambers. Honestly, I couldn’t have been happier with the former nest, but I’d rather not risk the possibility of contamination.

I’ll post pictures of the new build in the coming week. In the meantime take a look at this video of ants farming aphids.

CCNA certified

Well, it took me long enough to get my ass in gear to do it – but I finally got around to taking the CCNA – and passed on the first attempt.

I’d been planning on doing so for as far back as my last few years in commercial radio, but a level of uncertainty (“What exactly is ON the exam?”) led to my procrastination.

Eventually I came upon the non-credit offering brochure of my local community college, and found they offered a class on what one needs to know and study to pass the CCNA.

The course was fast paced and had an impressive instructor (smart, rarely drifted off topic, had good studying suggestions, and a pretty good sense of humor). It also included a number of materials: Lab manuals, Cisco Certified Network Associate Study Guide (ISBN: 0470110082) by Todd Lamlee, and copies of RouterSim Network Visualizer 6.0 and CertSim. (There was plenty of hands-on lab time as well, including two Saturday workshops).

The  Network Visualizer software  is nice when away from the classroom lab – although I quickly found that I preferred using my home lab instead (something I’d pieced together via ebay over time).

A 2950, 2 1751's, a 26xx (and 2 2900's not pictured)

The home lab consists of a random number of bits: 2 1751’s with T1 CSU/DSU’s (got at a price of $39.00 together off Ebay), a 26xx ($60.00 off Ebay), 2 Cisco 2900XL’s (appx $70 together from Ebay), a 2950XL (about $80.00 off Ebay), 2 Quagga routers, an ImageStream Rebel Router, and a server dedicated to virtual servers (which I used to emulate 7204’s via Dynamips). Yes, a lot of the equipment is old, but it works great.

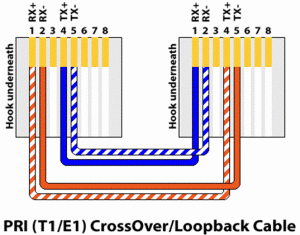
By the way – you CAN connect the T1 WICs back to back using a T1 crossover cable. Many other types of cards (ADSL cards for instance) don’t allow you to do this.

A T1 crossover cable (Integrated or external CSU/DSU is required)

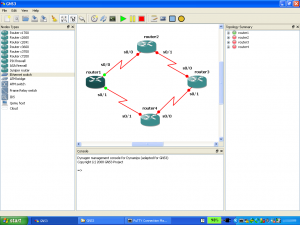
When away from the house, I quickly become fond of  Dynamips (a Cisco Router emulator based off of QEMU). Only after the exam did I learn the beauty of GNS3, a great front-end for Dynamips that allows one to lay out a network graphically. (Which saves a lot of time as I was previously building everything by hand).

GNS3 - making network simulation easy

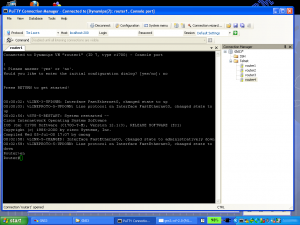
When using GNS3, I personally recommend also using PuttyCM to enjoy the use of tabbed Putty connections to your simulated equipment. I believe a youtube video from Train Signal is what ledme to PuttyCM (although it appears they may have been using something slightly different):

This is PuttyCM

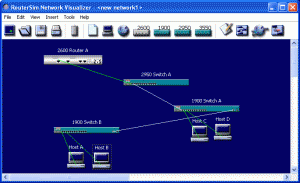
As I mentioned, the course provided a few decent pieces of software – the first being Network Visualizer. The biggest pro to Network Visualizer is that it doesn’t require a copy of an IOS image to run a simulated router. It does cause CPU to ramp at times (of course Dynamips does the same thing emulating a device), and it is limited in IOS commands, but for an introductory piece of software, it’s not bad.

This is RouterSim

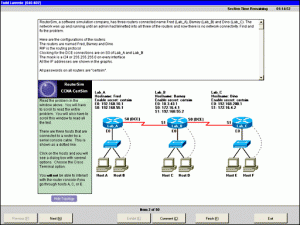
The real beauty in the RouterSim Suite is CertSim. CertSim is almost the exact same experience one has at taking the actual exam. I’m not sure how many questions are in the CertSim question bank, I only ever came across a very very small number of Simlets though. I should disclose that I actually worked with CertSim for about a day, as I’d not realized I had it:

A realistic simulation of what the CCNA exam is like.

Having plenty of PTO to burn, in the end I decided to schedule my exam on a Monday, and take off the previous Friday. 3 days of nothing but studying (well, I took  breaks here and there to play with my latest toy and grab more coffee) and Monday I got the cert.

Next up? The first of 3 exams for the CCNP.

New Wireless Toy

I’ve really been enjoying the feedback on the free wireless access from my neighbors. As always, everytime I start a new hobby, I end up with a handful of new toys – and I got one just today:

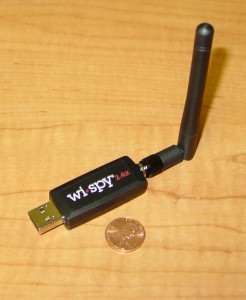
The Wi-Spy 2.4x

The Wi-Spy 2.4x is a portable USB spectrum analyzer for the 2.4Ghz range (They have other models that cover 900mhz and 2.4/5Ghz). The 2.4x model includes an external antenna (SMA), whereas the 2.4i has an internal antenna only.

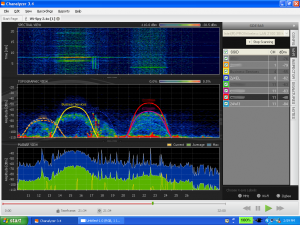
The Accompanying Chanalyzer software

With the use of a wireless card, one can overlay SSID’s atop the channels in the Topographical  graph and determine what radiation  belongs to which Access Point. The bottom graph (Planar view) allows one to view which Zigbee channel, wifi channel, or frequency range is most in use.

There’s a similar device on the market which is substantially cheaper, the Airview,  manufactured by Ubiquiti Networks (~$39 vs. ~$160), but from what I’ve seen, the Chanalyzer sofware in use with the Wi-Spy appears to have more features (the ability to record your captures, the ability to overlay RF “fingerprints” of various devices atop your captures), etc. The Airview software is written in Java (Read:  supported in Linux), whereas Chanalyzer is written in .NET (good luck with that one under WINE).

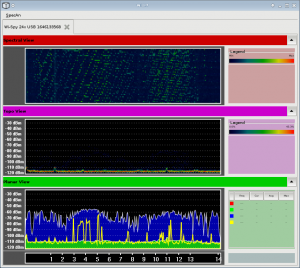
There are Linux tools for use with the Wi-Spy (Spectrum-Tools) which I can defnitely appreciate,  but again the recording/playback and fingerprinting along with SSID overlays really make Chanalyzer nice. (For the record, you can actually record the data using one of the tools in the Spectrum Tools suite… I don’t believe you can playback easily though)

Spectrum Tools: from the author of Kismet

I’m supposed to be working on a number of other things at the moment (studying for an exam being the major item on my to-do list) so unfortunately this post is more of a “guess what I just got” as opposed to a “look at what this can do”.  In the next few weeks, I plan on picking up an AirView also, and will provide a side-by-side comparison of the two.

In the meantime, check out this video advertising the Wi-Spy, and if you have any experience, recommendations or thoughts on it or the AirView – hit me up in the comments.